First Steps
Help for Your First Poll on StrawPoll
We've put together a list of five simple steps to follow when creating your first survey on StrawPoll. The screenshots will help you not to miss important features.
1.) Choose Your Question and Add Possible Answers
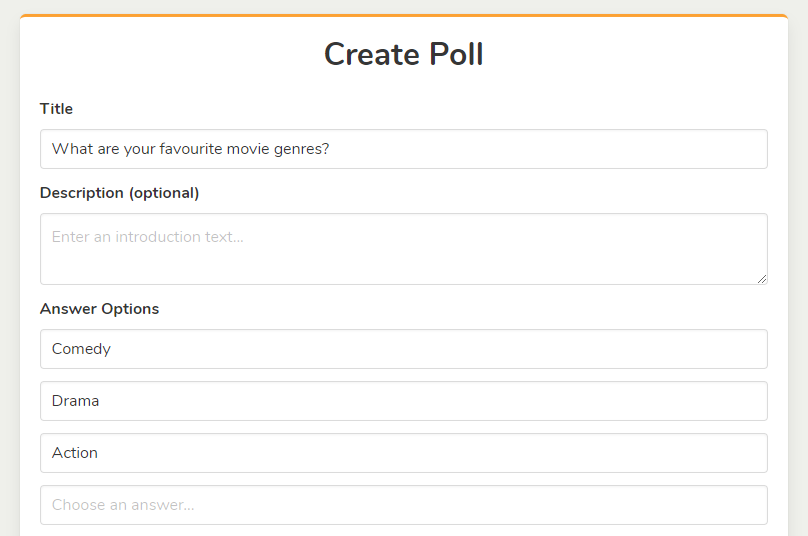
As an example, the image above shows the creation of a poll about favorite movie genres. Of course you can add more answer options to the poll.
2.) Choose Your Main Settings
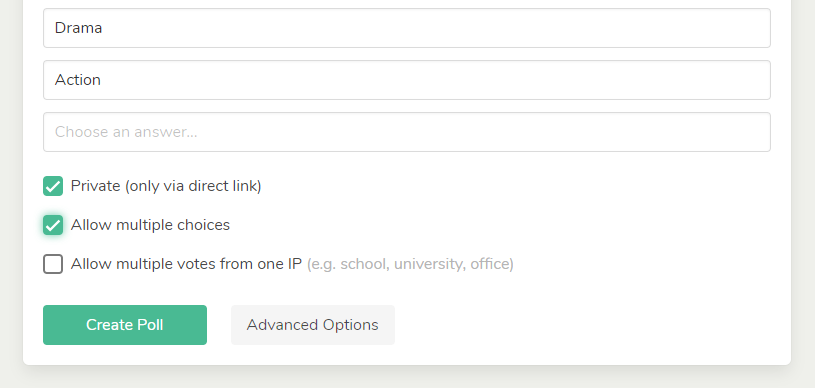
Selecting your settings for your poll can easily forgotten, but it is quite important. At least, it's not bad to know all the options you have. We grouped the poll settings in "main" and "advanced" settings in order to provide the best possibile usability for all use cases. The example above sets the poll "private", which ensures that it is not listed in the "Discover" section. By activating the second check box, the voters can select several answers at once. In the example above, the check for duplicate votes is done via the IP address (and other secret measurements). In schools or universities you often have only one public IP address, so the default duplication check does not work properly. In this case, you can activate the third check box so that the verification of duplicate voting rights is performed using a cookie.
3.) Check the Advanced Poll Settings
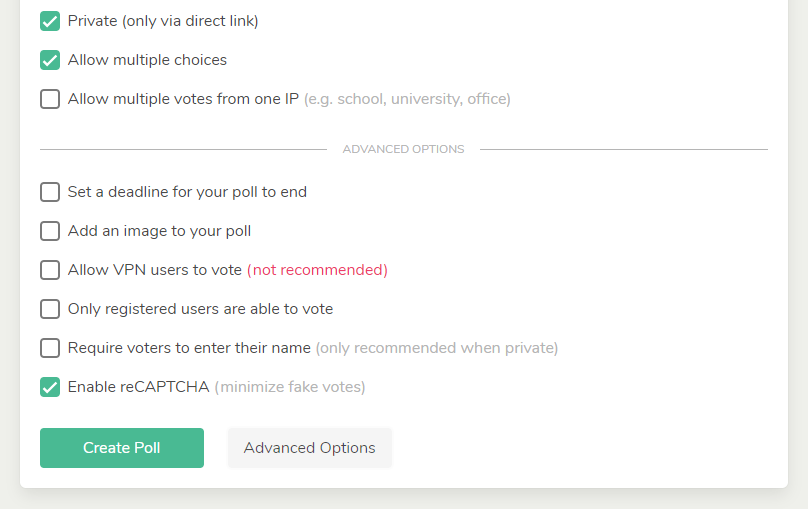
When you click on the "Advanced Options" button, a list of more detailed refinement options for your poll opens. Here you can choose a specific date as the deadline date for your poll. After this date, it will no longer be possible to vote on your poll. You can also upload an image for your poll, which is displayed between your title/description and the poll options. By default, we block VPN users from participating in the vote, since most VPN users use their service to generate fake IPs, which makes it more difficult to check for double voting. But if you are sure that your voters will not manipulate your poll, you can check this option. There may be cases where you want only registered users with a valid email address to participate in your vote, so there is an option to enable it. If you do not want your voters to be anonymous, you can select the option "Require voters to enter their name". With this option you will have another table on the results page showing who voted for which option. Finally, we have added a reCAPTCHA v3 check by default to minimize fake votes. Users do not have to enter a classic CAPTCHA, but a background check is performed to determine if the voter is human or not.
4.) Create and Share Your Poll
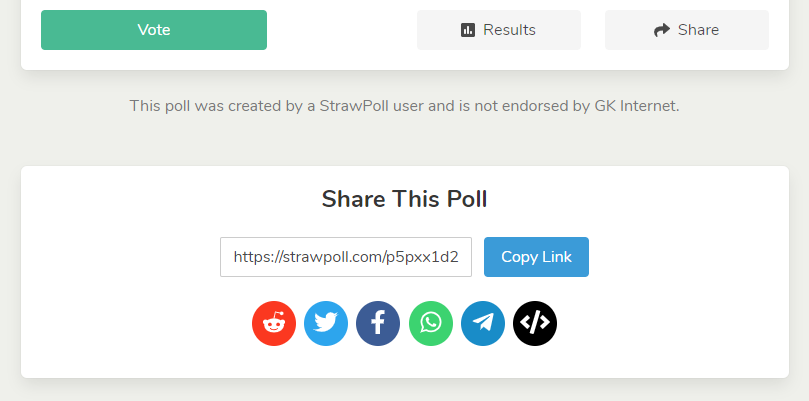
Once you have selected your survey options, you can click on the "Create Poll" button and you will be redirected to your poll page. Below to the poll there are various content sections such as "Share This poll", "Comments" and "Information On This Poll". Let's start with the first one: Sharing your poll with your participant is the first step to a successful poll. You will be provided with a short link, e.g. "https://strawpoll.com/p5pxx1d2", which your participants can use to access your poll. You can simply click on the "Copy Link" button to copy it to your clipboard. There are various other buttons to help you distributing your poll via social media such as Reddit, Twitter or Facebook or via messenger such as WhatsApp or Telegram.
5.) Manage Your Poll via Your Admin Functions
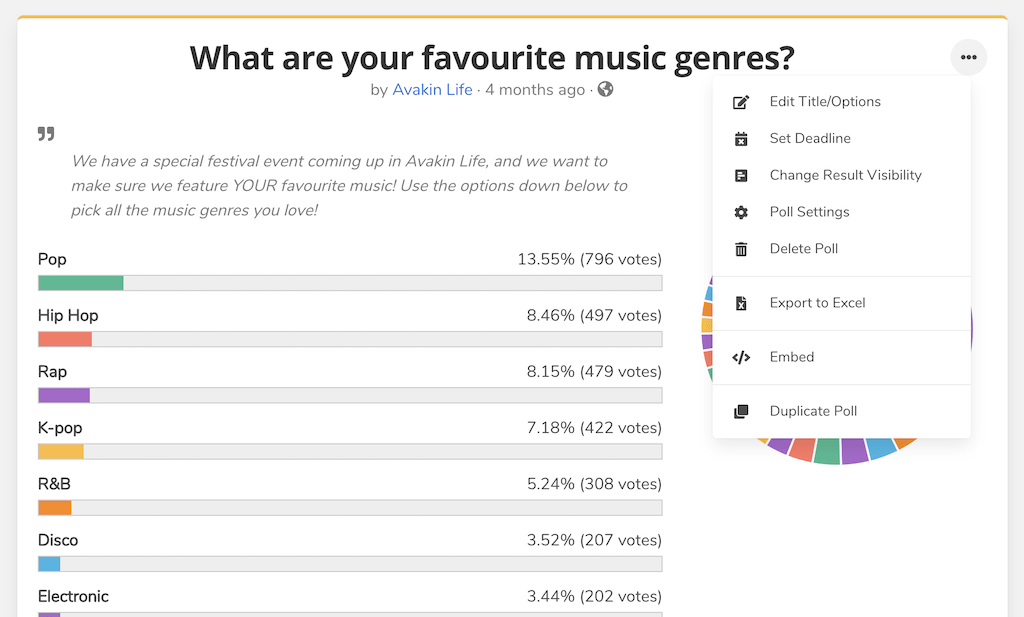
At the top right of your poll page, as well as on the poll results page, various management features are added to the options drop-down menu. Only the poll creator can see these features and make changes to your poll. Be careful if you create a poll without an account: Your admin rights are stored in your cookies and can be deleted the next time you reset your browser. Having an user account helps you to securely preserve the administrative rights of your polls. Ss you can see in the example above, you can update the title, description and answer options of your poll. In addition, you can change the deadline of your poll and edit settings like the public/private visibility of your survey or enable and disable the comments section. You can change the way your participants can view the poll results. On the poll results page, you can also choose to export your poll results to Excel. Finally, you can delete your poll from our platform.
6.) View and Analyze Results
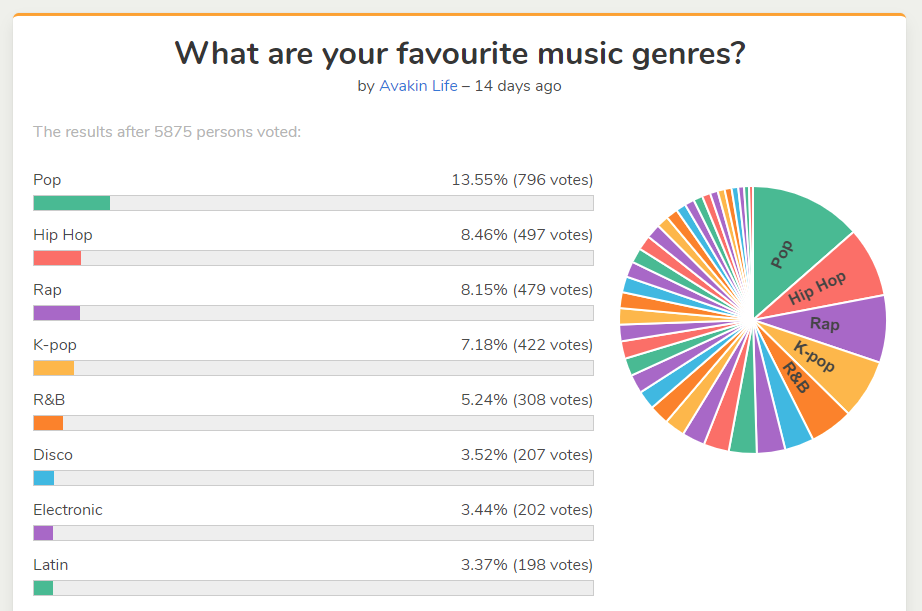
You can view the poll results in real time at any time. Simply click on the "Results" button on your poll page. and you will be redirected to a graphical representation of the votes in your poll, as in the example above. In addition to the list of votes and the pie chart, we offer you detailed analyses of when and from where your voters took part in your poll. You can find this function by clicking on "Open Vote Analytics" at the bottom of the results page.
Congratulations! You have finished this tutorial. Now you can try to create a poll yourself or return to the First Steps overview.